
Are you tired of having a soggy and waterlogged lawn? This can be a problem for many homeowners, especially after heavy rainfalls or if your lawn is built on clay soil.
A waterlogged lawn can be a frustrating problem, leading to poor grass health, muddy conditions, and limited usability of your outdoor space. Excess water can result from heavy rainfall, poor soil drainage, or improper landscaping, and addressing the issue promptly is crucial to prevent long-term damage. Draining a waterlogged lawn requires a combination of identifying the underlying cause and implementing practical solutions to restore balance.

This guide on how to drain a waterlogged lawn will walk you through effective methods to tackle water pooling on your lawn and create a healthier, more enjoyable outdoor environment.
What Are the Benefits of Draining a Waterlogged Lawn?
Draining a waterlogged lawn offers several benefits, including:
- Preventing Soil Erosion: When excess water accumulates on your lawn, it can wash away topsoil and nutrients, leading to patchy and bare areas.
- Promoting Healthy Grass Growth: Too much water can drown your grass roots, depriving them of oxygen and causing the grass to turn yellow or die. By draining the excess water, you are providing oxygen and creating an environment for healthy root growth.
- Reducing Mosquito Breeding Grounds: Standing water is a perfect breeding ground for mosquitoes, which can carry diseases. By draining the water from your lawn, you are decreasing the chances of having mosquitoes breed in your yard.
- Preventing Slip and Fall Accidents: Wet, slippery grass can be hazardous to walk on, especially for children and the elderly. By removing excess water, you are creating a safer environment for everyone to enjoy your lawn.
What Will You Need?
To properly drain excess water from your lawn, you will need some basic tools and materials. These may include:
- Spade or shovel
- Wheelbarrow
- Garden hose
- Drainage pipe or ditch liner
- Gravel or crushed stone
- Sand or topsoil
You may also consider seeking professional help if the drainage issue is significant and requires a more complex solution.
10 Easy Steps on How to Drain a Waterlogged Lawn
Step 1: Assess the Problem Area
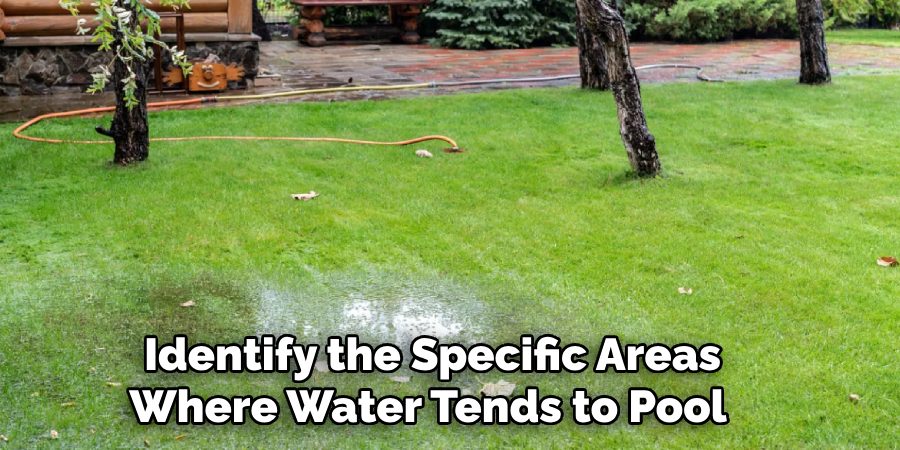
Start by closely examining your lawn to identify the specific areas where water tends to pool or stagnate. Look for signs such as soggy patches, visible puddles, or areas with dying grass and plants. Take note of the location, size, and duration of standing water after a rainfall. Additionally, check for possible contributing factors, such as compacted soil, low-lying areas, or improper grading. Understanding the extent and source of the problem is crucial for deciding the best drainage solution. Document your findings with photos or sketches to help plan your next steps effectively.
Step 2: Test the Soil
Testing the soil is an important step in addressing drainage issues. Start by assessing the soil type in the affected areas—whether it’s sandy, loamy, or clay-based—as different soil types have varying water retention properties. To do this, take a small handful of soil and dampen it slightly. If the soil crumbles easily, it’s likely sandy. If it sticks together but breaks down with slight pressure, it’s loamy.
If it feels sticky and forms a solid clump, it is clay-based, which can significantly hinder drainage. Conduct a percolation test by digging a small hole, filling it with water, and timing how long it takes for the water to drain completely. This can provide insights into how well the soil absorbs water. Understanding your soil type will guide you in determining whether amending the soil or installing other drainage solutions is necessary.
Step 3: Plan Your Drainage Solution
When planning your drainage solution, it’s essential to consider the unique characteristics of your landscape and soil type. For areas with clay-heavy soil, you may need to incorporate organic matter, such as compost, to improve soil structure and promote better water infiltration. Adding sand or gravel can also enhance drainage in some cases, but be cautious of overusing these materials, as they might compact over time. Alternatively, for sandy soils that drain too quickly, mixing in organic matter can help retain moisture.
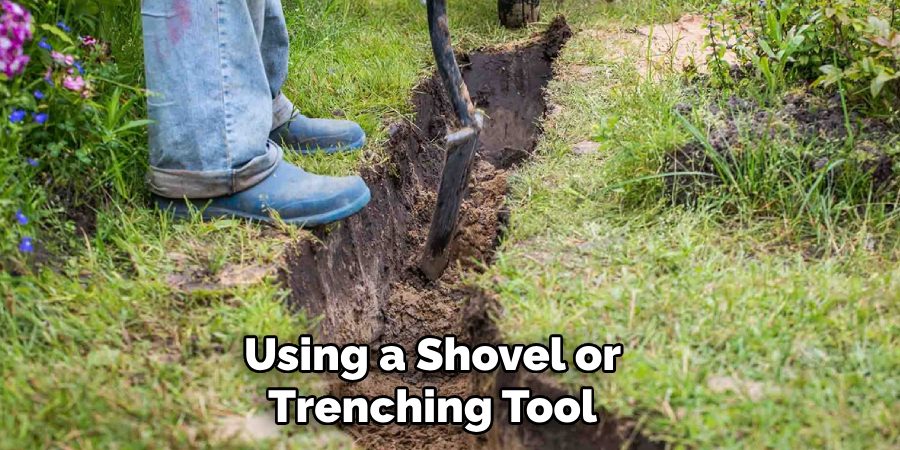
Step 4: Dig Trenches for Drainage
Once you have assessed your soil and prepared it accordingly, the next step is to dig trenches for effective drainage. Start by marking the areas where water tends to collect or flow excessively. Using a shovel or trenching tool, dig trenches that slope gently downward to guide water away from your garden or landscaping. Ensure the trenches are deep enough to handle heavy rain without overflowing but not so deep that they compromise structural foundations or root systems.
Line the trenches with gravel or small stones to prevent soil erosion and help with water filtration. Finally, connect the trenches to a drainage outlet, such as a dry well or a storm drain, ensuring water is directed to a safe area. Properly designed trenches will protect your landscape from waterlogging and improve overall soil health.
Step 5: Install a Drainage Pipe
To install a drainage pipe, start by selecting a perforated pipe suitable for your drainage needs, such as a PVC or flexible corrugated pipe. Lay the pipe along the bottom of the prepared trench, ensuring it follows the slope for proper water flow. Surround the pipe with gravel or crushed stone to provide stability and improve drainage efficiency. Wrap the pipe in a geotextile fabric if you’re concerned about sediment or debris clogging the perforations.
Once the pipe is secure, cover the trench with the remaining soil, packing it down firmly. This setup will help manage water accumulation effectively while maintaining the integrity of your landscape.
Step 6: Add Gravel or Crushed Stone
After laying the perforated pipe, start filling the trench with gravel or crushed stone. Use clean gravel that is free of dirt or debris to ensure the drainage process remains efficient over time. The gravel should surround the pipe, providing support and aiding in the flow of water through the perforations. Fill the trench up to a few inches below ground level, leaving space for a top layer of soil if desired. This additional layer of gravel acts as a filter, preventing larger particles from clogging the pipe and ensuring long-term functionality.
Step 7: Cover with Soil or Sand
Once the trench is filled with gravel, finish by covering it with a layer of soil or sand. This top layer helps to blend the drainage system seamlessly with the surrounding landscape. Use a shovel to evenly distribute the soil or sand over the gravel, making sure the surface is level and smooth. If desired, you can compact the soil lightly to stabilize the surface. For areas with grass or landscaping, consider replanting or adding sod to restore the original appearance.

Step 8: Level and Smooth Out the Lawn
Once the top layer of soil or sand has been applied, use a rake to evenly spread the material across the surface. Focus on filling in any low spots and ensuring a consistent level throughout the area. Take your time to inspect the lawn from different angles, as uneven patches may become more apparent from varying perspectives.
For larger spaces, you may use a leveling tool or a lightweight lawn roller to compact the soil gently, providing a smooth and even finish. This step is crucial for creating a stable surface and preparing the area for any additional landscaping, planting, or decorative elements you plan to implement.
Step 9: Reseed or Lay Sod
If you are reseeding, begin by evenly spreading grass seed across the prepared soil using a broadcast spreader for larger areas or by hand for smaller patches. After spreading the seed, lightly rake the topsoil to ensure the seeds are covered, helping them establish better contact with the soil. For laying sod, carefully position each piece edge-to-edge, avoiding any gaps or overlaps. Press the sod into place gently, and use a utility knife to trim pieces around edges or obstacles.
Step 10: Monitor and Maintain
After planting grass seed or laying sod, consistent monitoring and maintenance are key to ensuring healthy growth. Water the area thoroughly immediately after planting, and keep the soil consistently moist during the first few weeks. For seeded areas, avoid walking on the soil to prevent disturbing the seeds. Mow the lawn for the first time once the grass reaches about 3 to 4 inches tall, ensuring the mower blades are sharp to prevent tearing the young grass.
Additionally, regularly check for signs of pests or weeds, addressing any issues as they arise to protect the new lawn. Proper maintenance will encourage strong root development and a vibrant, lush lawn over time.

By following these tips, you can successfully establish a new lawn and enjoy the benefits of a well-maintained outdoor space.
Conclusion
How to drain a waterlogged lawn requires a combination of proper assessment and effective drainage methods.
Begin by identifying the cause of the waterlogging, whether it’s compacted soil, poor drainage, or excessive rainfall. Aerating the lawn can help improve soil permeability, allowing water to drain more efficiently. For more severe cases, consider installing a French drain or soakaway system to redirect excess water. Ensuring the lawn has proper slopes and removing any debris blocking natural drainage paths is also crucial.
By implementing these strategies, you can restore your lawn’s health and prevent future waterlogging issues.
About
Jennifer Branett is a distinguished figure in the world of Garden design, with a decade of expertise creating innovative and sustainable indoor solutions. His professional focus lies in merging traditional craftsmanship with modern manufacturing techniques, fostering designs that are both practical and environmentally conscious. As the author of garden, Jennifer delves into the art and science of garden-fix, inspiring artisans and industry professionals alike.
Education RMIT University
(Melbourne, Australia) Associate Degree in Design (Jennifer Branett) Focus on sustainable design, industry-driven projects, and practical craftsmanship. Gained hands-on experience with traditional and digital manufacturing tools, such as CAD and CNC software.
Nottingham Trent University
(United Kingdom) Bachelor’s in Garden and Product Design (Honors) Specialized in product design with a focus on blending creativity with production techniques. Participated in industry projects, working with companies like John Lewis and Vitsoe to gain real-world insights.Publications and Impact
In indoor, Jennifer Branett his insights on Garden design processes, materials, and strategies for efficient production. His writing bridges the gap between artisan knowledge and modern industry needs, making it a must-read for both budding designers and seasoned professionals.