
Are you excited about starting your own lupine garden? Don’t worry, you’re not alone! Lupines are beautiful and hardy plants that can add a pop of color to any garden.
how to scarify lupine seeds is an essential step to ensure successful germination, as these seeds possess a hard, impermeable outer coating that naturally slows the sprouting process. By carefully breaking or softening this tough seed coat, you can encourage water absorption, which is crucial for initiating growth. Additionally, scarification can also help to increase the oxygen levels that reach the embryo, further promoting healthy development.
Whether you’re an experienced gardener or trying your hand at growing lupines for the first time, understanding proper scarification techniques will help you cultivate these vibrant, pollinator-friendly flowers with ease.
What Are the Benefits of Scarification?
Scarification is a beneficial technique for many types of seeds, including lupines. Some of the main benefits include:
- Improved Germination: By breaking through the hard seed coat, scarification allows water and oxygen to reach the embryo, kickstarting the germination process.
- Faster Growth: With improved germination, seeds are able to grow faster and produce healthier plants.
- Increased Seed Viability: In some cases, older seeds may have a harder outer layer that can make it difficult for them to sprout. Scarification can help increase the viability of these older seeds by promoting water absorption and initiating growth.
- Enhanced Root Development: Proper scarification can also lead to stronger root development in seedlings, allowing them to absorb nutrients and water more effectively from the soil.
- Improved Seedling Survival: By aiding in proper root development and faster growth, scarification can also improve the survival rate of seedlings. This is especially important for plants that are typically difficult to start from seed.
- Wider Range of Plants That Can Be Grown From Seed: Some plant species have hard seeds that require scarification before they can germinate. By using this technique, gardeners and farmers can expand their options for what types of plants they can grow from seed.
What Will You Need?
To successfully perform scarification on seeds, you will need the following materials:
- Scarification tool (such as sandpaper, a knife, or acid)
- Seeds to be scarified
- Container for soaking seeds (optional)
- Water
It is important to note that not all seeds require scarification, and it is best to research the specific needs of the plant species before attempting this technique. In addition, caution should be exercised when using sharp tools or chemicals for scarification.
10 Easy Steps on How to Scarify Lupine Seeds
Step 1. Prepare Your Materials
Gather all the necessary materials for the scarification process. This includes a scarification tool, such as sandpaper, a small knife, or acid, depending on your chosen method. You will also need the lupine seeds you plan to scarify, a container for soaking (if required), and water. Ensuring you have all these items ready will make the process smoother and more efficient. Remember to work in a safe and well-lit area to prevent accidents.

Step 2. Inspect the Seeds
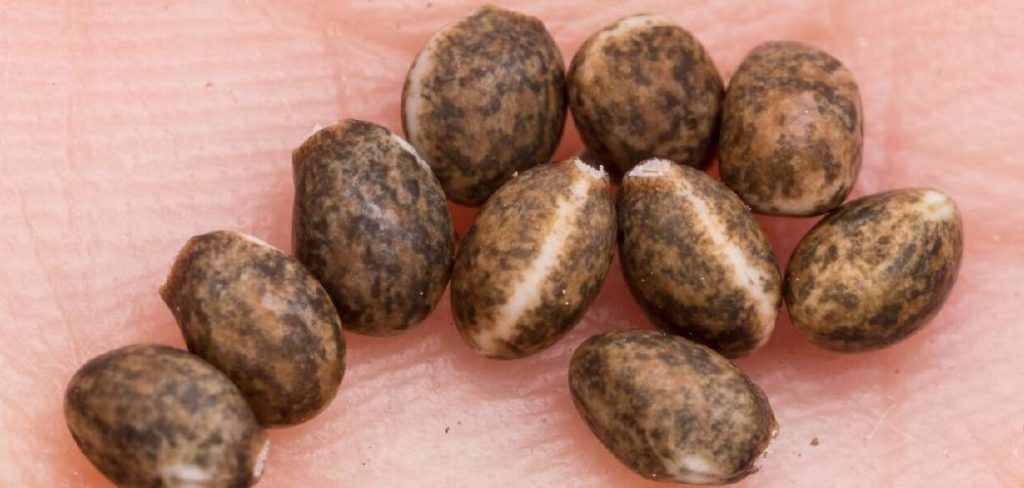
Before beginning the scarification process, carefully inspect the lupine seeds. Look for any signs of damage, mold, or discoloration, as these seeds may not germinate effectively. Healthy lupine seeds are typically hard, smooth, and uniform in color. Discard any seeds that appear compromised to ensure a successful germination process. Keep your selected seeds in a clean and organized area to avoid contamination.
Step 3. Scarify Using Sandpaper or Knife
Using sandpaper or a sharp knife, gently scarify the surface of each lupine seed. Scarification involves lightly scratching or nicking the hard outer shell of the seed to improve water absorption and encourage germination. If using sandpaper, hold the seed firmly and rub it against the rough surface until a small patch of the seed coat appears dulled or thinner.
If using a knife, carefully make a small incision or scratch on the seed’s surface, avoiding deep cuts that could harm the embryo inside. Work slowly and methodically to prevent damaging the seeds. After scarifying, place the seeds in a container to keep them organized before proceeding to the next step.
Step 4. Avoid Over-Scarification
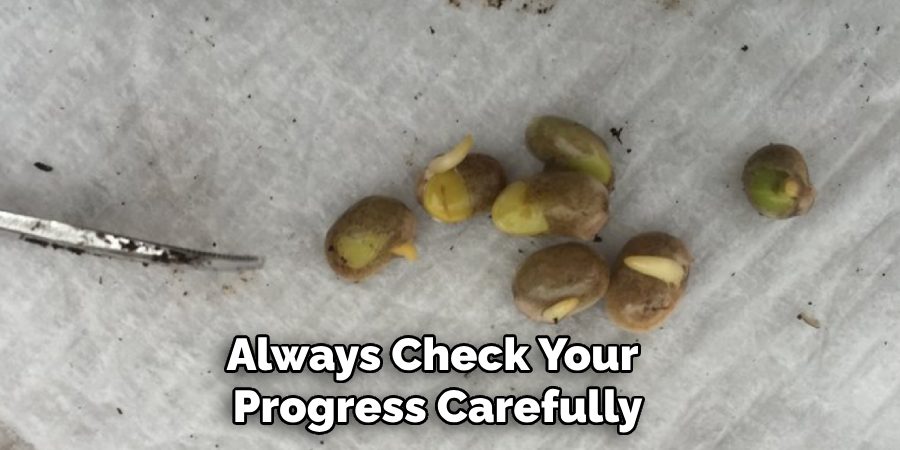
Over-scarification can damage the seed and jeopardize its ability to germinate successfully. When performing scarification, it is crucial to stop as soon as you notice a thin or dulled patch on the seed coat. Excessive scratching or cutting can penetrate too deeply, harming the embryo within and rendering the seed unusable.
Always check your progress carefully, and remember that the goal is to weaken the seed coat enough to allow water absorption, not to cut through it completely. Patience and precision are key to ensuring the seeds remain viable while preparing them for germination.
Step 5. Water Soak
Water soaking is an essential step to further prepare the seeds for germination. After scarification, place the seeds in a bowl of warm water, ensuring they are fully submerged. Leave them to soak for a period ranging from 12 to 24 hours, depending on the seed type. This process allows the seeds to absorb water, initiating the internal mechanisms necessary for growth. Be cautious not to exceed the recommended soaking time, as overly prolonged soaking can lead to seed rot or fungal growth.
Step 6. Drain and Prepare for Planting
After the soaking period, carefully drain the water from the container using a fine mesh strainer or by gently pouring it out, ensuring the seeds are not lost or damaged. Rinse the seeds briefly with clean, lukewarm water to remove any residue that may have accumulated during soaking.
Spread the drained seeds on a clean, dry surface, such as a towel or paper towel, to allow excess moisture to evaporate. This step is essential to prevent overly wet conditions, which can promote mold or fungus. Once the seeds are drained and slightly dry to the touch, they are ready to be planted in their growing medium or transferred to the next stage of germination as per your planting plan.
Step 7. Plant the Seeds
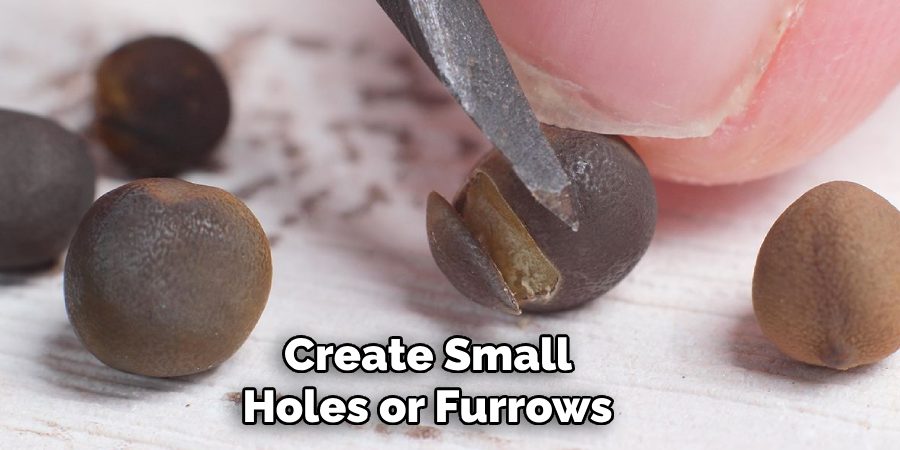
Choose a well-prepared growing medium that suits the specific needs of the seeds you are planting, such as nutrient-rich soil, a hydroponic system, or another suitable substrate. Fill your chosen container or garden bed with the medium, ensuring it is slightly damp but not waterlogged.
Create small holes or furrows at the appropriate depth for your seeds, typically outlined on the seed packet or recommended for the plant species. Place the seeds gently into these holes, then cover them lightly with the growing medium. Press down gently to ensure good contact between the seeds and the soil.
Finally, water the planted seeds lightly to keep the medium moist, setting the stage for successful germination and growth.
Step 8. Provide the Right Conditions
To ensure your seeds germinate successfully, it’s vital to provide the right conditions for their growth. Most seeds require a combination of warmth, moisture, and sometimes light to sprout. Check the specific requirements for the plant species you are growing, as they can vary widely. Place your seed tray or pots in a location where they’ll receive a consistent temperature, typically between 65°F and 75°F (18°C to 24°C), unless otherwise specified.
For seeds that require light to germinate, keep them in a brightly lit area, such as a sunny windowsill or under grow lights. Additionally, maintain even moisture by misting the soil with water and covering the containers with a plastic dome or wrap to retain humidity. Monitor the environment regularly, adjusting as necessary, to create the ideal conditions that encourage vigorous and healthy germination.
Step 9. Monitor for Germination
Once the seeds have been sown and placed in an optimal environment, it is important to observe them closely for signs of germination. Check daily for sprouting, which typically begins within a few days to a couple of weeks, depending on the plant species. Look for small shoots emerging from the soil, which indicate that the seed has successfully germinated. During this period, ensure the soil remains consistently moist but not waterlogged, as overwatering can lead to issues like rot. If covered with a plastic dome or wrap, remove it once the seedlings appear to allow proper air circulation. Continue to provide adequate light, as young seedlings require sufficient energy to grow strong and healthy.
Step 10. Care for the Seedlings
Once the seedlings have emerged, it’s crucial to provide them with the proper care to ensure healthy development. Position them in a location where they can receive ample light, whether from natural sunlight or a grow light, for about 12-16 hours a day. Keep the environment warm, maintaining a temperature suitable for the specific plant species. Monitor the soil moisture carefully, watering only when the top layer feels dry to prevent overwatering. If the seedlings are growing too close together, thin them out by removing the weaker ones to give the stronger ones room to flourish.
By following these steps, your seedlings will have a much higher chance of successfully growing into mature plants.

Conclusion
How to scarify lupine seeds is a simple yet effective technique to promote germination and ensure successful growth.
By gently nicking the hard seed coat with a small knife or rubbing it with sandpaper, you allow water to penetrate the seed more easily, initiating the germination process. It is important to handle the seeds carefully to avoid damaging the inner part of the seed. Once scarified, soaking the seeds in warm water for a few hours further enhances their ability to sprout.
This process mimics natural weathering in the wild and significantly improves germination rates, leading to healthier lupine plants.
About
Jennifer Branett is a distinguished figure in the world of Garden design, with a decade of expertise creating innovative and sustainable indoor solutions. His professional focus lies in merging traditional craftsmanship with modern manufacturing techniques, fostering designs that are both practical and environmentally conscious. As the author of garden, Jennifer delves into the art and science of garden-fix, inspiring artisans and industry professionals alike.
Education RMIT University
(Melbourne, Australia) Associate Degree in Design (Jennifer Branett) Focus on sustainable design, industry-driven projects, and practical craftsmanship. Gained hands-on experience with traditional and digital manufacturing tools, such as CAD and CNC software.
Nottingham Trent University
(United Kingdom) Bachelor’s in Garden and Product Design (Honors) Specialized in product design with a focus on blending creativity with production techniques. Participated in industry projects, working with companies like John Lewis and Vitsoe to gain real-world insights.Publications and Impact
In indoor, Jennifer Branett his insights on Garden design processes, materials, and strategies for efficient production. His writing bridges the gap between artisan knowledge and modern industry needs, making it a must-read for both budding designers and seasoned professionals.