
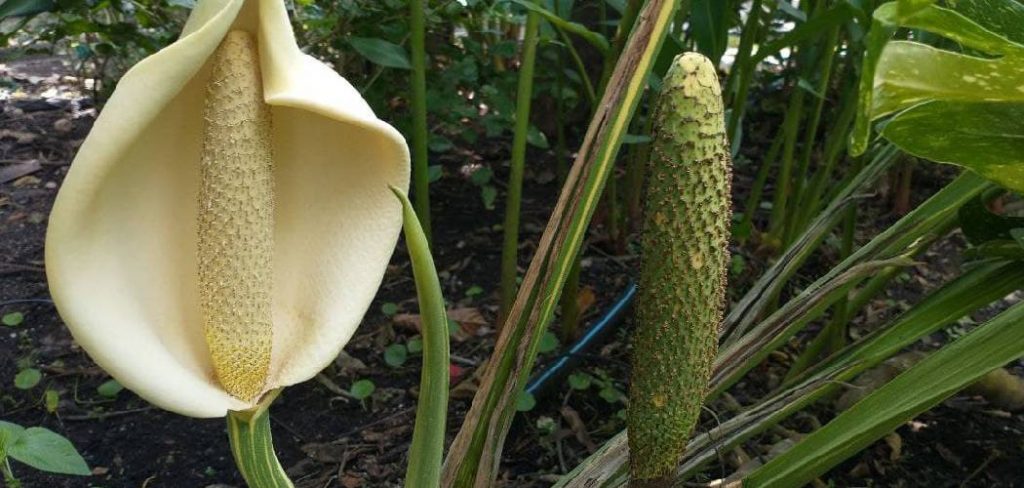
Germinating vanilla seeds can be a challenging but rewarding process for those who are patient and dedicated. Vanilla, derived from the orchid Vanilla planifolia, is one of the most sought-after spices globally and requires specific conditions to grow successfully. Unlike many other plants, vanilla seeds have a tough outer coating that needs special treatment to encourage germination.
This guide on how to germinate vanilla seeds will walk you through the essential steps and tips to increase your chances of successfully sprouting vanilla seeds and nurturing them into thriving plants.
Understanding Vanilla Seed Biology
To successfully germinate vanilla seeds, it is essential to first understand their unique biological characteristics. Vanilla seeds are incredibly small, resembling fine dust particles, and are enclosed within a tough outer coating. This seed coat, also known as the testa, protects the embryo but also presents a challenge for germination as it is impermeable to water and air.
Unlike many plant seeds, vanilla seeds lack endogenous nutrient reserves, meaning they rely heavily on external support such as a symbiotic relationship with specific mycorrhizal fungi during germination. These fungi assist in breaking down the seed coat and supplying nutrients to the developing plant. Knowledge of these biological dependencies is critical for providing the right conditions and treatments to facilitate germination and promote healthy seedling growth.
Choosing and Sourcing Vanilla Seeds
Selecting high-quality vanilla seeds is a crucial step in ensuring successful cultivation. It is essential to source seeds from reputable suppliers who can guarantee their viability and authenticity. Look for seeds that are derived from mature, healthy vanilla plants, as these are more likely to germinate successfully. Additionally, ensure that the seeds are fresh, as older seeds may have reduced viability due to prolonged storage.
When sourcing, consider the specific species or variety of vanilla you wish to cultivate, as different varieties may have unique growth requirements or flavor profiles. Verify the origins of the seeds and, if possible, seek certificates of authenticity or compliance with agricultural standards to avoid counterfeit or low-quality products. By carefully choosing and sourcing your vanilla seeds, you lay a strong foundation for a successful cultivation process.
7 Step-by-Step Guidelines on How to Germinate Vanilla Seeds
Step 1: Prepare the Growing Medium
To successfully germinate vanilla seeds, it is crucial to prepare a nutrient-rich and well-draining growing medium. Start by mixing equal parts of fine orchid bark, sphagnum moss, and a small amount of perlite to improve aeration. Vanilla plants thrive in slightly acidic conditions, so ensure the pH level of the medium ranges between 5.5 and 6.5.
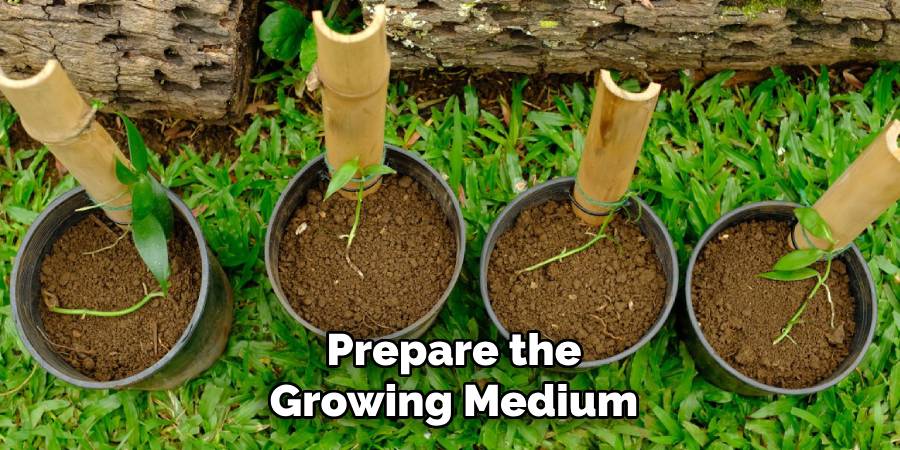
Sterilize the mixture by baking it in the oven at 180°F (82°C) for about 30 minutes or steaming it to eliminate any harmful pathogens or pests. Once cooled, moisten the growing medium with filtered or distilled water to create the perfect balance of moisture without oversaturation. This prepared medium will serve as an ideal environment for promoting the delicate process of germination.
Step 2: Select Healthy Vanilla Seeds
Choosing high-quality vanilla seeds is crucial for successful germination and plant growth. Start by sourcing seeds from a reputable supplier to ensure they are fresh and viable. Inspect the seeds carefully, looking for any signs of damage, such as cracks, discoloration, or deformities, as these can affect their ability to germinate.
If possible, opt for seeds known for their high germination rates. Healthy seeds are typically firm and uniform in appearance, free of mold or other contaminants. Proper seed selection lays the foundation for a thriving vanilla plant and maximizes the chances of success in the cultivation process.
Step 3: Sow the Seeds
Once you’ve selected high-quality seeds, it’s time to sow them. Begin by preparing a nutrient-rich, well-draining soil mixture, ideally one with a slightly acidic pH between 6.0 and 6.5. Fill small pots or seed trays with the soil, ensuring they have adequate drainage holes to prevent waterlogging. Lightly moisten the soil before sowing to create an ideal environment for germination.
Place the seeds on the surface of the soil, pressing them gently to ensure contact, but avoid burying them too deeply as vanilla seeds require light to germinate. Cover the pots or trays with a thin layer of plastic wrap or a humidity dome to maintain moisture levels, and position them in a warm, bright location with indirect sunlight. Patience is key during this step, as germination can take several weeks to months, depending on the conditions. Regularly check for signs of sprouting, and keep the soil consistently moist but not soggy to nurture the seeds as they begin to grow.
Step 4: Provide Optimal Growing Conditions
Once your vanilla seeds have germinated and small seedlings have appeared, it’s essential to create the best possible environment to encourage healthy growth. Vanilla plants thrive in warm, humid conditions, so aim to maintain a consistent temperature between 77°F and 85°F (25°C to 29°C) with humidity levels above 80%. Place the seedlings in a spot with bright, indirect sunlight to avoid scorching their delicate leaves.
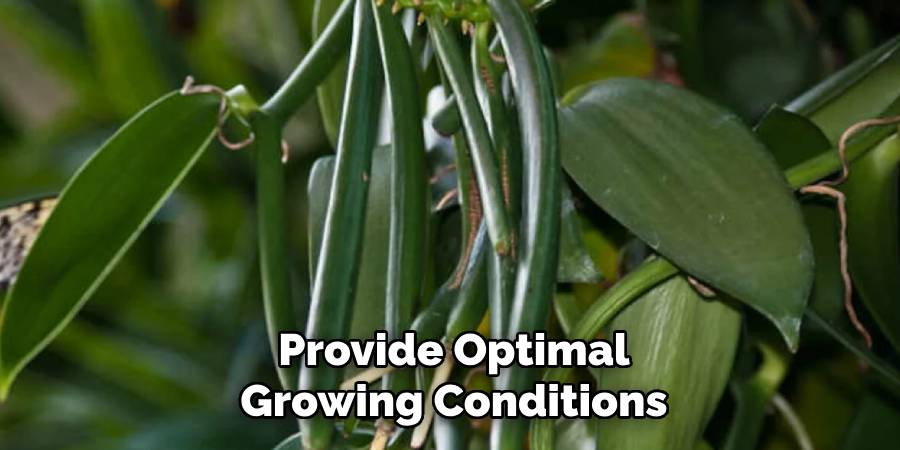
Regularly mist the plants to replicate their natural tropical habitat, and ensure the soil remains moist but never waterlogged. Incorporating a trellis or support structure can also help the vines grow upward efficiently as they mature. Providing these ideal conditions will establish a strong foundation for your vanilla plants to flourish.
Step 5: Be Patient and Wait for Germination
Vanilla plants require time and consistent care to establish themselves and begin to flourish. Germination and initial growth can be a slow process, often taking several weeks or even months, depending on the conditions provided. During this period, continue to monitor the temperature, humidity, and soil moisture carefully, ensuring the environment remains stable and conducive for growth. Patience is essential at this stage, as rushing or neglecting the plants can hinder their development. With diligent care, your efforts will eventually be rewarded as the vanilla plants grow stronger and more established.
Step 6: Transplant the Seedlings
Once the vanilla seedlings have grown strong enough and their root systems are well-developed, they can be transplanted into their permanent location. Choose a site with partial shade and good support structures, such as trellises or trees, to allow the vines to climb as they grow. Carefully remove the seedlings from their containers, taking care not to damage the delicate roots.
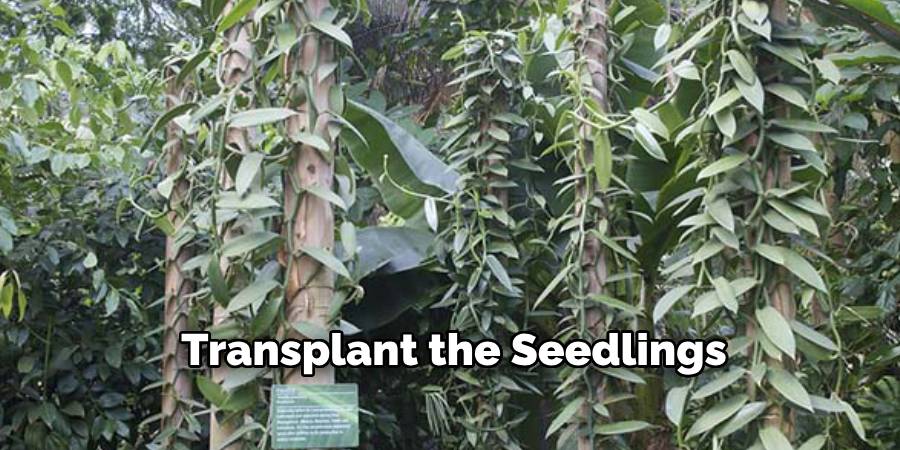
Plant them in nutrient-rich, well-draining soil, ensuring proper spacing between each seedling to allow adequate airflow and room for growth. Water the newly transplanted seedlings immediately and maintain consistent soil moisture to help them adapt to their new environment. Regular monitoring and gentle care during this stage will be key to ensuring a successful transition.
Step 7: Care for Your Vanilla Plant
Proper care is essential for nurturing your vanilla plant and ensuring its healthy growth. Begin by providing consistent moisture to the soil, but avoid waterlogging, as this can lead to root rot. Vanilla plants thrive in warm, humid environments, so maintain an ideal temperature range of 70-85°F (21-29°C) and consider misting the plant to increase humidity levels if necessary. Regularly check for pests and diseases, addressing any issues promptly to prevent damage. Additionally, provide a sturdy support structure, such as a trellis or pole, to encourage the vines to climb naturally. Prune any dead or unhealthy leaves to promote vigorous growth and keep your plant thriving.
Following these steps on how to germinate vanilla seeds and care for vanilla plants will help you successfully grow this tropical delicacy in your own home. With patience and proper care, you can enjoy the beauty and fragrance of vanilla blooms as well as the satisfaction of harvesting your very own vanilla beans to use in various culinary creations. So get started on your journey to growing vanilla today!
Additional Tips for Growing Vanilla Plants
- Choose a well-draining potting mix with good aeration for growing your vanilla plant.
- Water consistently, but do not overwater, as this can lead to root rot.
- Fertilize regularly with a balanced fertilizer specifically formulated for orchids or flowering plants.
- Consider using organic fertilizers such as compost or fish emulsion for a more natural approach.
- Provide support for your growing vanilla plant, as it will eventually produce long vines that can reach up to 30 feet in length.
- Consider using a trellis or stake to help the vines grow upright and prevent them from becoming tangled.
Frequently Asked Questions
Q1: Can I Grow a Vanilla Plant Indoors?
A: Yes, vanilla plants can be grown indoors as long as they receive adequate sunlight and proper care.
Q2: How Long Does It Take for a Vanilla Plant to Produce Beans?
A: It typically takes about 3-5 years for a vanilla plant to produce beans. Patience is key when growing vanilla!
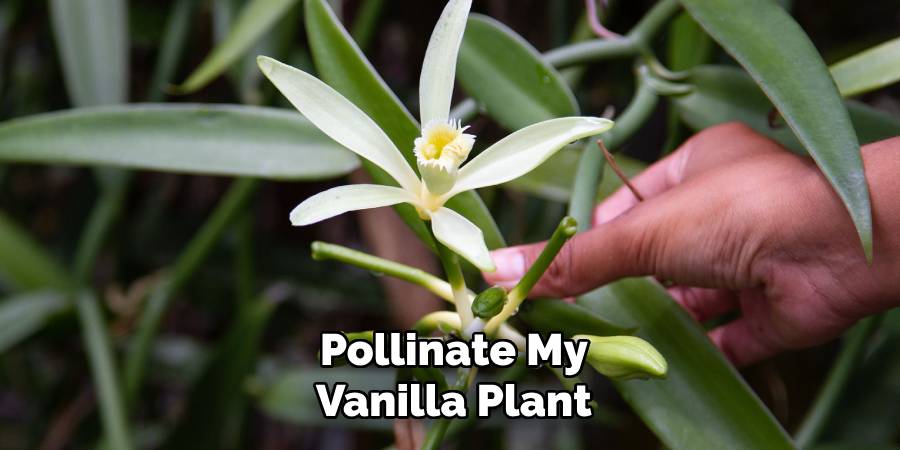
Q3: How Do I Pollinate My Vanilla Plant?
A: Vanilla plants are pollinated by hand, using a small tool to transfer pollen from the male to the female flowers. This process can be time-consuming, but it is essential for successful bean production.
Conclusion
Growing vanilla at home can be a rewarding but challenging endeavor. With proper care, patience, and attention to detail, you can successfully cultivate this unique and valuable plant. Whether it’s ensuring adequate sunlight, mastering the art of hand pollination, or waiting for the beans to mature, the process is a true labor of love.
The result—a harvest of fragrant, home-grown vanilla beans—is worth every effort. Thanks for reading this article on how to germinate vanilla seeds.
About
Jennifer Branett is a distinguished figure in the world of Garden design, with a decade of expertise creating innovative and sustainable indoor solutions. His professional focus lies in merging traditional craftsmanship with modern manufacturing techniques, fostering designs that are both practical and environmentally conscious. As the author of garden, Jennifer delves into the art and science of garden-fix, inspiring artisans and industry professionals alike.
Education RMIT University
(Melbourne, Australia) Associate Degree in Design (Jennifer Branett) Focus on sustainable design, industry-driven projects, and practical craftsmanship. Gained hands-on experience with traditional and digital manufacturing tools, such as CAD and CNC software.
Nottingham Trent University
(United Kingdom) Bachelor’s in Garden and Product Design (Honors) Specialized in product design with a focus on blending creativity with production techniques. Participated in industry projects, working with companies like John Lewis and Vitsoe to gain real-world insights.Publications and Impact
In indoor, Jennifer Branett his insights on Garden design processes, materials, and strategies for efficient production. His writing bridges the gap between artisan knowledge and modern industry needs, making it a must-read for both budding designers and seasoned professionals.