
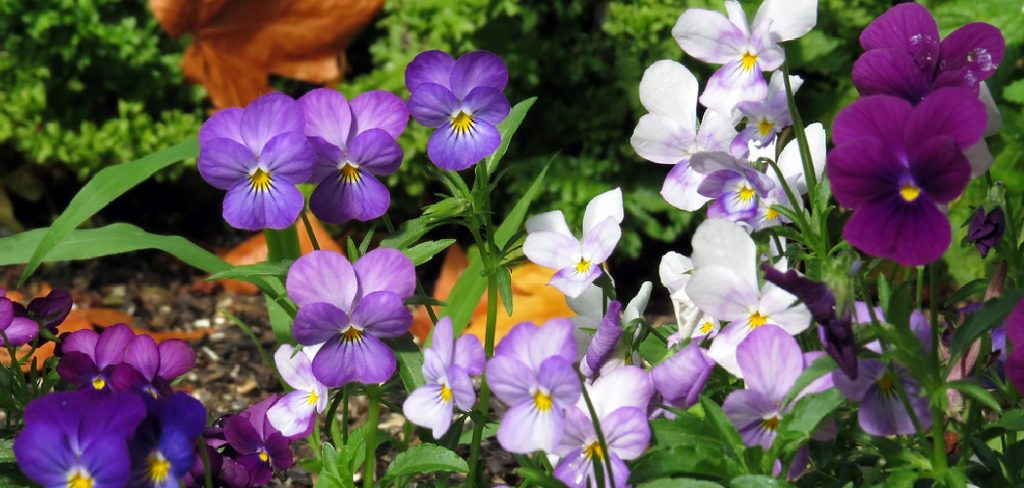
Planting viola seeds is a simple and rewarding activity that brings vibrant color and life to any garden or outdoor space. Known for their delicate, colorful blooms and resilience in various climates, violas are a favorite among gardeners of all skill levels. By following a few essential steps and providing the right care, you can enjoy a flourishing display of these charming flowers throughout the growing season.
This guide on how to plant viola seeds will walk you through everything you need to know to successfully plant and nurture viola seeds.
Choosing the Right Viola Variety
When selecting a viola variety to plant, it’s important to consider factors such as climate, growing conditions, and personal preference. Violas come in a wide range of colors, patterns, and sizes, making them incredibly versatile and suited to various garden styles. Varieties like Johnny-Jump-Ups are known for their hardiness and vibrant purple and yellow hues, while larger-flowered types, such as Sorbet or Penny series, offer an eye-catching display in both garden beds and containers.
If you’re in a region with mild winters, opt for varieties that can tolerate cooler temperatures to enjoy blooms throughout the seasons. Researching and choosing a variety that thrives in your local conditions will ensure a successful and beautiful planting experience.
Tools & Materials Needed
- Viola Seeds
- Seed-starting Trays or Small Pots
- Seed-starting Mix or Well-draining Potting Soil
- Spray Bottle or Gentle Watering Can
- Labels or Markers
- Sunny Windowsill or Grow Lights (for Indoor Starting)
6 Simple Step-by-Step Guidelines on How to Plant Viola Seeds
Step 1: Choose the Right Time to Sow Your Viola Seeds
Timing is critical when planting viola seeds to ensure healthy growth and vibrant blooms. For best results, sow your seeds in late winter or early spring if starting indoors. This provides the seedlings ample time to develop before being transplanted outdoors after the last frost.
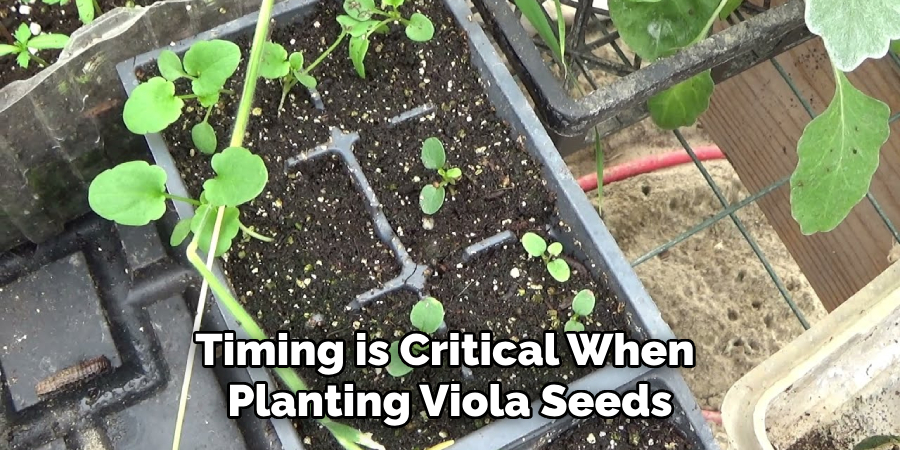
If planting directly in the garden, aim for early spring once the soil is workable, or in late summer to early fall for blooms the following season. Always consider your local climate and growing zone to determine the perfect timing for your violas.
Step 2: Prepare Your Seed-starting Trays or Pots
Choose seed-starting trays or small pots with good drainage to ensure your viola seeds have the best start. Fill them with a high-quality, well-draining seed-starting mix, which provides the right balance of nutrients and moisture retention.
Lightly moisten the soil before planting; it should be damp but not soaking wet. Creating the ideal environment at this stage will encourage better germination and set the foundation for strong, healthy plants.
Step 3: Sow Your Viola Seeds
Sprinkle the viola seeds evenly over the surface of the moistened seed-starting mix. These seeds are tiny, so take care not to overcrowd them during sowing.

Gently press the seeds into the surface of the soil, but do not cover them completely, as viola seeds need light to germinate. Mist the top layer lightly with water to ensure good contact between the seeds and soil. Place the trays or pots in a location with indirect sunlight or under grow lights to support the germination process.
Step 4: Water Your Seeds
Maintaining the right level of moisture is crucial for successful germination. Water the seeds gently to avoid disturbing them or washing them out of the soil. It is best to use a spray bottle or a watering can with a fine nozzle to distribute water evenly and softly.
Keep the soil consistently moist but not waterlogged, as excess water can lead to mold or rot. Monitor the soil’s moisture daily, especially if placed under grow lights, as this can cause the soil to dry out more quickly.
Step 5: Provide Adequate Light and Temperature
Once the seeds have been planted and watered, ensuring they receive proper light and temperature is essential for healthy growth. Most seeds require ample light to germinate, so place them in a location with bright, indirect sunlight or use grow lights if natural light is insufficient.
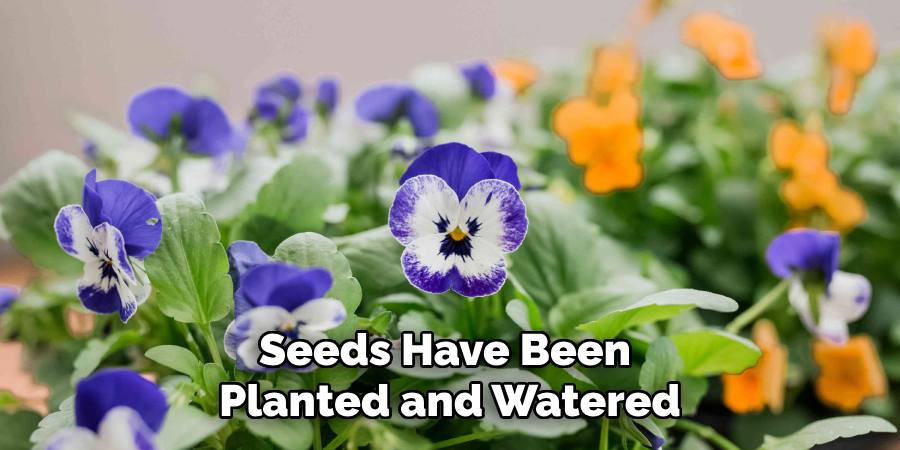
Position grow lights close enough to the seedlings, around 2-4 inches above, and adjust as they grow to prevent legginess. Additionally, maintaining the right temperature is crucial. For most seeds, a temperature range between 65°F and 75°F works well, but always refer to specific requirements for the plant variety. Use a heating mat if needed to maintain a consistent soil temperature, especially in cooler climates. With adequate light and temperature, seeds will sprout into strong, healthy seedlings.
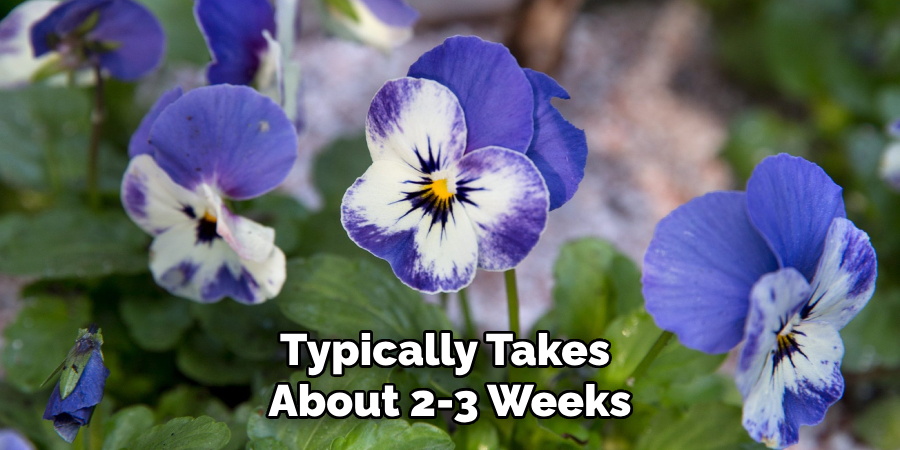
Step 6: Be Patient and Care For Your Seedlings
It typically takes about 2-3 weeks for viola seeds to germinate. Keep monitoring the moisture levels in the soil and make sure your seedlings are getting enough light. Once they have grown a few sets of true leaves, you can transplant them into individual pots or directly into your garden.
Following these steps on how to plant viola seeds will ensure a successful and colorful addition to your garden. Remember to be patient and give your seedlings the proper care they need to thrive.
Additional Tips for Growing Violas
- If you are starting with seeds, try using a mix of vermiculite and perlite as a germination medium. This will provide good drainage while also retaining moisture for the delicate seedlings. Once they have sprouted, you can transplant them into potting soil.
- Violas prefer cool temperatures and will do well in partial shade. If you live in a warmer climate, try planting them in an area that receives morning sun and afternoon shade.
- To promote continuous blooming, deadhead spent flowers regularly. This will also prevent the plant from going to seed too quickly.
- Water violas regularly, but be careful not to overwater as this can lead to root rot. Allow the top inch of soil to dry out before watering again.
- Fertilize with a balanced fertilizer every 2-3 weeks during the growing season.
- Mulch around your viola plants to help retain moisture and suppress weeds.
- Keep an eye out for pests, such as aphids and slugs, which can damage the flowers. Use organic pest control methods to keep them at bay, rather than harsh chemicals.
- In colder climates, violas can be planted in containers and brought inside during the winter months. Make sure to place them near a sunny window to ensure they continue to thrive.
- With proper care and maintenance, violas can bloom from early spring until late fall, providing beautiful color and vibrancy to any garden or landscape.
- Violas also make great companion plants, often attracting pollinators like bees and butterflies to your garden.
- Consider incorporating different varieties of violas into your garden, such as those with different colors and patterns, to add visual interest and diversity.
Ongoing Care and Maintenance
To keep your violas healthy and thriving, regular care is essential. Ensure they are watered consistently, keeping the soil moist but not overly saturated. Deadheading, or removing spent blooms, encourages continuous flowering and prevents the plant from diverting energy into seed production. Applying a balanced, water-soluble fertilizer every few weeks can promote vigorous growth and vibrant blossoms.
Additionally, monitor for any signs of pests or diseases, such as aphids or powdery mildew, and address them promptly with suitable methods, like insecticidal soap or organic fungicides. During particularly hot weather, consider providing partial shade to protect your violas from excessive heat, as they prefer cooler temperatures. With the right care, violas can remain a brilliant feature in your garden season after season.
Frequently Asked Questions
Q: How Often Should I Water My Violas?
A: Violas require regular watering, but the frequency may vary depending on factors such as weather and soil conditions. Generally, aim to keep the soil consistently moist, not soggy or dry. A good rule of thumb is to water whenever the top inch of soil feels dry to the touch.
Q: Can Violas Be Grown in Containers?
A: Yes, violas can be grown in containers and make a lovely addition to porches, balconies, and windowsills. Make sure to use well-draining potting soil and provide regular watering as container plants may dry out more quickly than those planted directly in the ground.
Q: How Do I Deadhead My Violas?
A: Deadheading or removing spent flowers is important for promoting continuous blooming in violas. Simply pinch off the faded flowers at their base. This will also prevent seed production, which can hinder future blooming. Regular deadheading will also help maintain a neat and tidy appearance for your violas.
Q: How Often Should I Fertilize My Violas?
A: Violas do not require frequent fertilization, but it can be beneficial to give them a boost of nutrients during their active growing season. Using a balanced fertilizer once every 2-3 weeks is sufficient. Be sure to follow the instructions on the fertilizer packaging and avoid over-fertilizing, as this can lead to excessive foliage growth at the expense of blooms.
Conclusion
Caring for violas can be a rewarding experience, as these charming and versatile flowers bring vibrant colors to any garden or container. By providing the proper amount of sunlight, water, and nutrients, and performing regular maintenance such as deadheading and pruning, you can enjoy healthy and abundant blooms throughout their growing season.
With a little attention and care, violas can thrive and continue to enhance your outdoor spaces with their cheerful presence. Thanks for reading this article on how to plant viola seeds.
About
Jennifer Branett is a distinguished figure in the world of Garden design, with a decade of expertise creating innovative and sustainable indoor solutions. His professional focus lies in merging traditional craftsmanship with modern manufacturing techniques, fostering designs that are both practical and environmentally conscious. As the author of garden, Jennifer delves into the art and science of garden-fix, inspiring artisans and industry professionals alike.
Education RMIT University
(Melbourne, Australia) Associate Degree in Design (Jennifer Branett) Focus on sustainable design, industry-driven projects, and practical craftsmanship. Gained hands-on experience with traditional and digital manufacturing tools, such as CAD and CNC software.
Nottingham Trent University
(United Kingdom) Bachelor’s in Garden and Product Design (Honors) Specialized in product design with a focus on blending creativity with production techniques. Participated in industry projects, working with companies like John Lewis and Vitsoe to gain real-world insights.Publications and Impact
In indoor, Jennifer Branett his insights on Garden design processes, materials, and strategies for efficient production. His writing bridges the gap between artisan knowledge and modern industry needs, making it a must-read for both budding designers and seasoned professionals.