
Repotting a shamrock plant is a simple yet important process to ensure its continued health and growth. Over time, shamrock plants can outgrow their containers, leading to crowded roots and diminished soil nutrients. By repotting, you provide the plant with fresh soil, more space, and an ideal environment to thrive.

Whether you’re a beginner gardener or an experienced plant enthusiast, learning to repot a shamrock plant is an invaluable skill that will keep your plant vibrant and flourishing. In this article on how to repot a shamrock plant, we’ll cover the essential steps and tips for successful repotting.
Why Repot a Shamrock Plant?
Repotting a shamrock plant is necessary when you notice that it has become root-bound. This term refers to when the roots have filled up their container and have no more room to grow. A root-bound plant will show signs of stunted growth, yellowing leaves, and may even stop producing flowers or new shoots. By repotting, you give the plant more space for its roots to spread out and access fresh nutrients from the soil.
Additionally, repotting can also help rejuvenate a tired-looking shamrock plant. As plants grow, their roots deplete the nutrients in the soil. By repotting, you provide new, fresh soil for the plant to thrive in. This can result in healthier, greener leaves and more vibrant blooms.
When to Repot a Shamrock Plant?
Knowing when to repot your shamrock plant is essential for its continued health and growth. Generally, shamrock plants benefit from repotting every one to two years. The best time to do this is during early spring, just as the plant starts emerging from its dormant phase.
Signs that your shamrock plant may need repotting include overcrowded roots, reduced growth, or a noticeable decline in the plant’s overall vigor. By carefully timing the repotting process, you ensure that the plant thrives and remains a beautiful addition to your home or garden.

Materials Needed for Repotting
- New Pot (1-2 Inches Larger in Diameter) With Drainage Holes.
- Fresh, Well-draining Potting Mix (Standard Indoor Plant or Light Soil Mix).
- Gloves (Optional, for Handling Bulbs or Rhizomes).
- Watering Can and Optional Tools for Loosening Soil.
8 Step-by-Step Guides on How to Repot a Shamrock Plant
Step 1: Prepare the New Pot
Start by selecting a pot that is 1-2 inches larger in diameter than the current pot to provide ample room for growth. Ensure the new pot has adequate drainage holes at the bottom to prevent waterlogging, which can lead to root rot. If desired, you can place a layer of small stones or mesh over the drainage holes to keep soil from escaping.
Fill the pot with fresh, well-draining potting mix about halfway, creating a stable base for the shamrock plant. This preparation ensures the plant has a healthy environment to thrive in its new home.
Step 2: Water Your Shamrock Plant
After replanting, water your shamrock plant thoroughly to help settle the soil and reduce transplant stress. Pour water slowly and evenly until it begins to drain from the bottom of the pot. Be careful not to overwater; shamrock plants prefer slightly moist soil but are sensitive to overly soggy conditions.
Allow the top inch of the soil to dry out slightly between waterings to maintain the right balance. Proper watering is essential to keep your shamrock plant hydrated and thriving in its new pot.
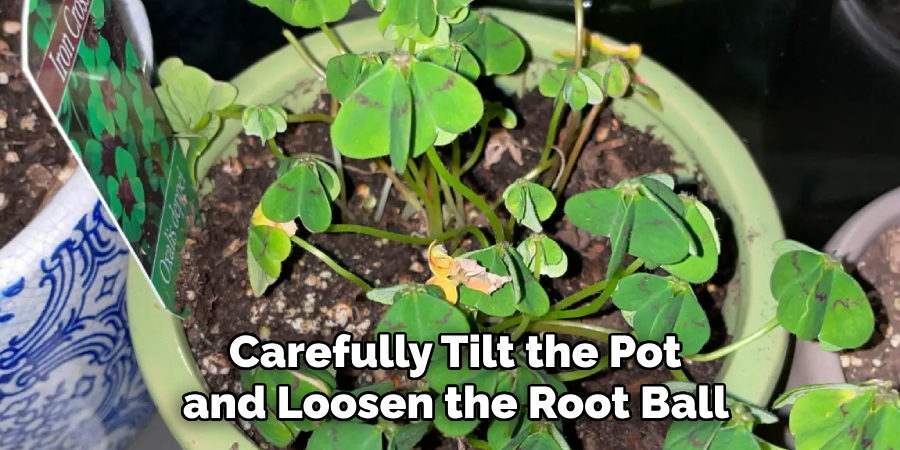
Step 3: Remove Plant From Current Pot
To remove your shamrock plant from its current pot, gently grasp the base of the plant near the soil line. Carefully tilt the pot and loosen the root ball by squeezing the sides of the container, if it’s flexible. If the pot is rigid, use a small tool like a butter knife to slide around the inner edge, separating the soil from the pot walls.
Be cautious not to tug forcefully, as this can damage the delicate roots. Once loosened, slowly lift the plant out of the pot, ensuring the roots remain intact and undisturbed. Taking your time during this step helps minimize stress to the plant.
Step 4: Prepare New Pot
Choose a new pot that is slightly larger than the previous one to allow the plant room to grow. Ensure the pot has adequate drainage holes to prevent water from accumulating and causing root rot. Fill the bottom of the new pot with a layer of fresh, well-draining soil, creating a small mound in the center.
If you are using a potting mix, select one that suits the specific needs of your plant, such as a cactus mix for succulents or a moisture-retentive blend for tropical plants. This preparation will provide a stable foundation and promote healthy root development in the new container.
Step 5: Add Fresh Soil
Carefully place your plant into the new pot, ensuring that its roots are spread out evenly over the mound of soil. Gradually add fresh, well-draining soil around the roots, gently pressing it down to eliminate air pockets.
Be cautious not to pack the soil too tightly, as this can restrict root growth and reduce oxygen flow. Fill the pot until the soil surface is level with the base of the plant, leaving a small gap between the soil and the rim of the pot to allow for easy watering.
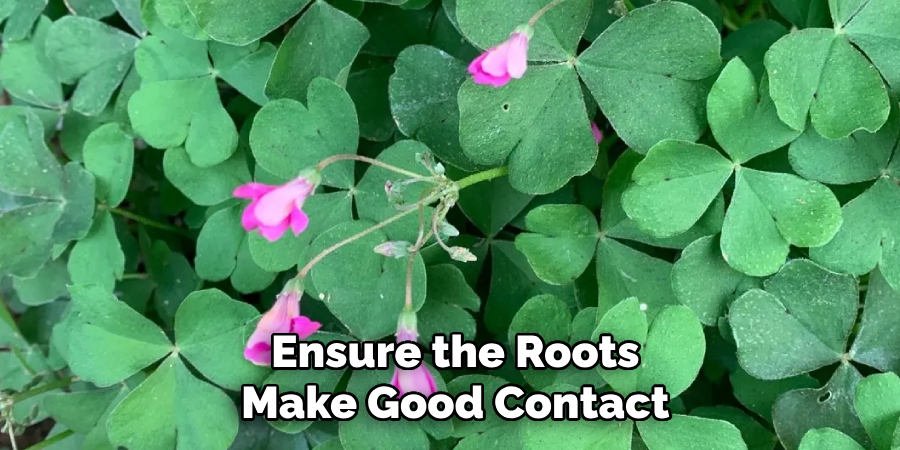
Step 6: Water Thoroughly
Once your plant is securely in its new pot, give it a thorough watering to help the soil settle and ensure the roots make good contact with their new environment. Use room-temperature water and pour slowly until you notice it beginning to drain from the bottom of the pot.
Avoid overwatering, as this may lead to waterlogging and root rot. After watering, allow the pot to drain completely before placing it in its designated spot. Keep an eye on your plant in the coming days, as it may need time to adjust to its new home.
Step 7: Water and Fertilize
After the initial watering, establish a regular watering schedule based on your plant’s specific needs. Observe the soil moisture level by checking it with your finger; water when the top inch of soil feels dry. Along with watering, consider incorporating a balanced liquid fertilizer into your routine.
Apply the fertilizer once every two to four weeks during the plant’s active growing season, following the instructions on the label for proper dilution. Be cautious not to over-fertilize, as this can harm the plant. Proper hydration and nutrition will help your plant thrive and maintain healthy growth.
Step 8: Place in Indirect Light
Most indoor plants thrive in bright, indirect light. Position your plant near a window that allows filtered sunlight to reach it, such as one with sheer curtains or blinds. Avoid exposing your plant to direct sunlight for prolonged periods, as this can scorch the leaves and cause discoloration. If natural light is limited, consider using grow lights to supplement its needs. Adjusting the light conditions appropriately will ensure your plant gets the energy it needs for photosynthesis while maintaining healthy foliage.
Following these steps on how to repot a shamrock plant will not only give your plant the space it needs to thrive, but also allow you to check for any potential issues such as root rot or pests. It is important to regularly repot your shamrock plant, especially if it has outgrown its current pot or shows signs of being rootbound.
Regular Maintenance
To keep your shamrock plant healthy and thriving, consistent care is essential. Water the plant sparingly, ensuring the soil remains slightly moist but never soggy, as overwatering can lead to root rot. Fertilizing once a month during the growing season with a balanced, water-soluble fertilizer will provide the nutrients necessary for strong growth.
Additionally, remove any yellowing or dead leaves to encourage new growth and maintain the plant’s appearance. Shamrock plants also benefit from a period of dormancy; when the foliage begins to die back, reduce watering and allow the plant to rest for a few weeks before resuming regular care. This cycle is vital to ensure your plant remains robust year after year.
Frequently Asked Questions
Q1: How Often Should I Water My Shamrock Plant?
A: It is important to keep the soil consistently moist but not waterlogged. Water your shamrock plant once or twice a week, depending on the humidity and temperature of your home. Make sure the top inch of soil is dry before watering again.
Q2: Why are the Leaves of My Shamrock Plant Turning Yellow?
A: Yellow leaves can be a sign of overwatering or a lack of nutrients in the soil. Check the moisture level of the soil and adjust your watering schedule accordingly. If the plant receives enough water, try fertilizing it with a balanced houseplant fertilizer every other week during its growing season.
Q3: Can I Repot My Shamrock Plant?
A: Yes, you can repot your shamrock plant when it becomes root-bound or if you want to refresh the potting mix. You should aim to repot in the spring when the plant is actively growing. Choose a pot that is one size larger than the current one, and make sure it has drainage holes. Gently remove the plant from its old pot, loosen up the roots, and place it in the new pot with fresh potting mix. Water thoroughly after repotting and continue to care for your shamrock plant as usual.

Conclusion
In conclusion, caring for a shamrock plant can be a rewarding experience for plant enthusiasts of all levels. By providing the right amount of sunlight, water, and attention to its growth needs, such as repotting when necessary, you can ensure a thriving and healthy plant.
With proper care, your shamrock plant will continue to brighten your space with its delicate and vibrant foliage, adding a touch of nature’s charm to your home. Thanks for reading this article on how to repot a shamrock plant.
About
Jennifer Branett is a distinguished figure in the world of Garden design, with a decade of expertise creating innovative and sustainable indoor solutions. His professional focus lies in merging traditional craftsmanship with modern manufacturing techniques, fostering designs that are both practical and environmentally conscious. As the author of garden, Jennifer delves into the art and science of garden-fix, inspiring artisans and industry professionals alike.
Education RMIT University
(Melbourne, Australia) Associate Degree in Design (Jennifer Branett) Focus on sustainable design, industry-driven projects, and practical craftsmanship. Gained hands-on experience with traditional and digital manufacturing tools, such as CAD and CNC software.
Nottingham Trent University
(United Kingdom) Bachelor’s in Garden and Product Design (Honors) Specialized in product design with a focus on blending creativity with production techniques. Participated in industry projects, working with companies like John Lewis and Vitsoe to gain real-world insights.Publications and Impact
In indoor, Jennifer Branett his insights on Garden design processes, materials, and strategies for efficient production. His writing bridges the gap between artisan knowledge and modern industry needs, making it a must-read for both budding designers and seasoned professionals.