
Thinning out seedlings is a crucial step in gardening that helps ensure healthy plant growth and optimal yields. When too many seeds sprout in a small space, the seedlings compete for essential resources like light, water, and nutrients, which can hinder their development.
By carefully removing the weaker or excess seedlings, you give the remaining plants the room and nourishment they need to thrive. This guide on how to thin out seedlings will walk you through the process of thinning your seedlings effectively and safely.
Why Thinning Seedlings is Essential?
Thinning seedlings is a vital practice for cultivating strong, healthy plants. Without thinning, overcrowded seedlings can struggle to access the necessary light, water, and nutrients they need to grow. This competition often results in weak, spindly plants that are more susceptible to diseases and pests. By removing the excess seedlings, the remaining plants are given more space to develop robust root systems and sturdy stems.
Additionally, thinning helps prevent issues like poor air circulation, which can lead to mold and fungal growth. Ultimately, thinning ensures that each plant has the best chance to reach its full potential, leading to a more fruitful and successful garden.
When to Thin Seedlings?
The best time to thin seedlings is once they have developed their first set of true leaves. These leaves are distinct from the initial seed leaves, or cotyledons, and indicate that the plant is beginning to grow more independently. At this stage, the seedlings are sturdy enough to handle the thinning process, yet still young enough to recover quickly from any disturbance.
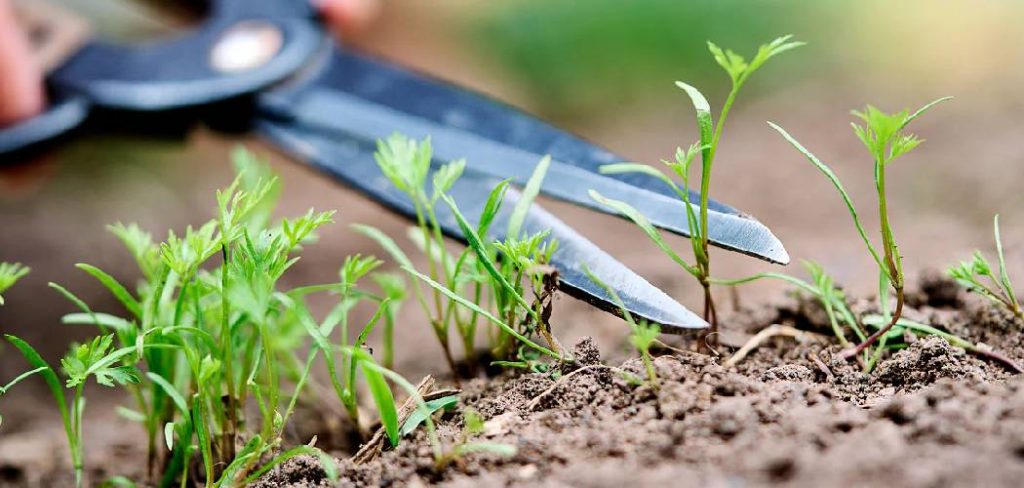
Thinning is ideally done when the soil is moist, which helps to minimize damage to the roots of the remaining seedlings. Using small scissors to snip unwanted seedlings at the soil line is a gentle method that avoids uprooting nearby plants. By timing the thinning process correctly, you can ensure the health and vitality of your garden.
Tools and Materials Needed
- Small Scissors or Snips
- Tweezers (for Delicate Seedlings)
- Garden Labels (to Mark Rows or Clusters)
- Watering Can or Spray Bottle (to Water After Thinning)
7 Simple Step-by-Step Guidelines on How to Thin Out Seedlings
Step 1: Identify the Healthiest Seedlings
Begin by carefully examining your seedlings to identify the healthiest and strongest ones. Look for plants that are robust, have sturdy stems, and display vibrant green leaves. These seedlings are more likely to thrive and produce a higher yield in the long run.
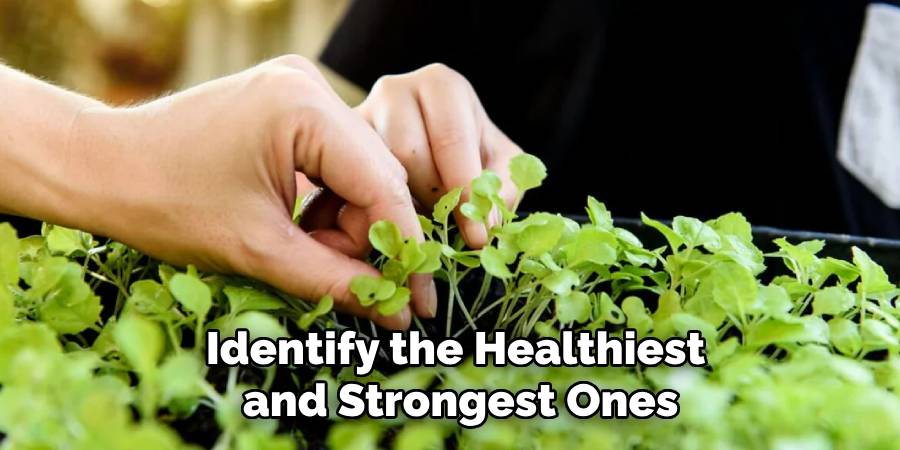
Take your time during this step to ensure you make the best selections for your garden’s overall success.
Step 2: Prepare a Thinning Tool
Choose a suitable tool to assist with the thinning process. Options include small scissors, gardening shears, or even your fingers, depending on the size and type of seedlings you are working with.
Ensure the tool is clean and sharp to make precise cuts and reduce the risk of spreading disease among your plants. Proper preparation of your tools will help ensure a smooth and efficient thinning process.
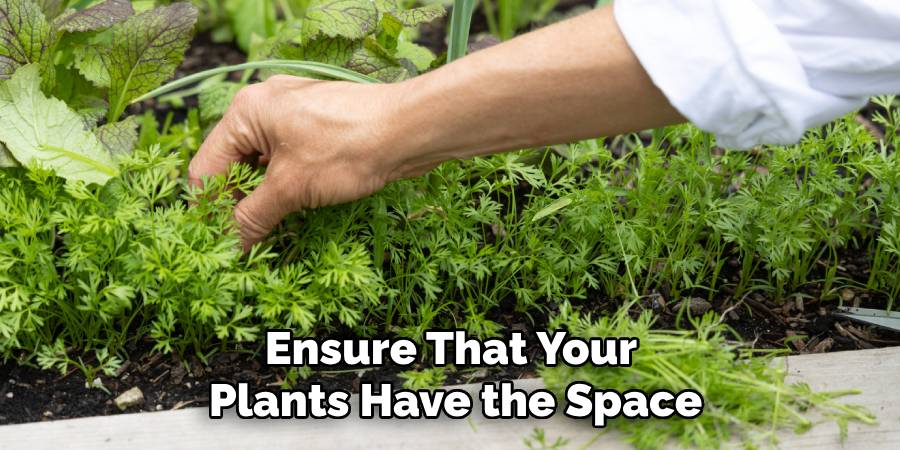
Step 3: Determine the Optimal Spacing
Before thinning your seedlings, research the recommended spacing for the specific plants you are growing. This information can typically be found on seed packets or in gardening guides. Optimal spacing ensures that each plant has adequate room to access sunlight, nutrients, and water, promoting healthy growth and minimizing competition.
Mark out the desired spacing in your garden bed or container to use as a guide during thinning. By carefully planning the spacing, you set the stage for a thriving and productive garden.
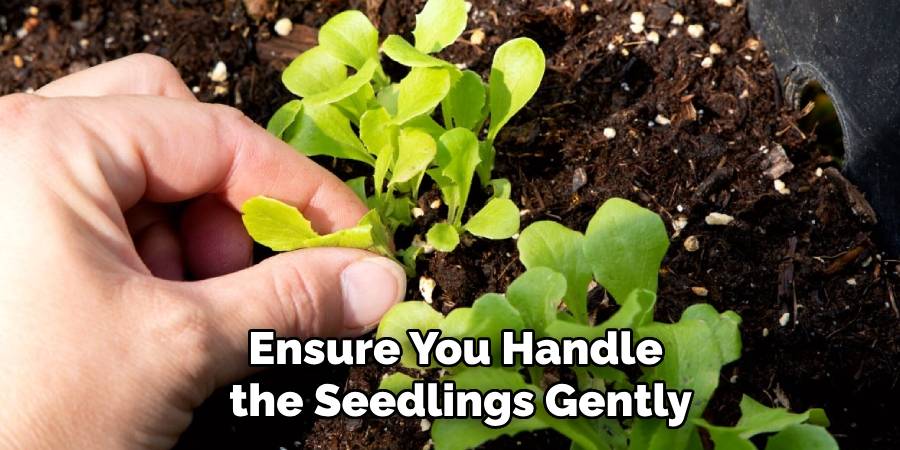
Step 4: Decide Which Seedlings to Remove
When deciding which seedlings to remove, focus on selecting the healthiest plants to keep. Look for seedlings that are strong, upright, and free from discoloration or deformities. Smaller, weaker, or overcrowded seedlings are typically the best candidates for removal, as they may struggle to thrive or compete with healthier plants for resources.
Ensure you handle the seedlings gently to avoid disturbing the roots of the ones you wish to keep. If necessary, consider using small scissors to snip the unwanted seedlings at the base to prevent damage to the surrounding soil and roots. Careful selection at this stage contributes to the overall success of your garden.
Step 5: Use Clean Tools
When tending to your garden, it’s crucial to use clean tools to prevent the spread of diseases and pests. Dirty tools can harbor harmful pathogens, which may infect your plants and hinder their growth. Before use, sterilize your tools by wiping them down with a solution of one part bleach to nine parts water or using a specialized garden disinfectant.
Regularly cleaning cutting tools like pruners or scissors is especially important when working with multiple plants, as it minimizes the risk of cross-contamination. Maintaining clean tools not only protects your plants but also ensures that your equipment remains in good condition for future use.
Step 6: Thin Gently
Thinning plants is a crucial step to ensure proper growth and prevent overcrowding. When seedlings are growing too close together, gently remove the weaker ones to give stronger plants more space, light, and access to nutrients. This process helps avoid competition and encourages healthier, more robust development.
Use your fingers or a sterilized tool to carefully pluck or snip the extras, being mindful not to disturb the roots of the remaining plants. Thinning may feel counterintuitive, but it is an essential practice for a thriving garden.
Step 7: Transplanting
Once your seedlings have grown strong and healthy, it’s time to transplant them into larger containers or directly into your garden. Before transplanting, make sure to harden off your seedlings by gradually exposing them to outdoor conditions over a period of 1-2 weeks. This will help acclimate the plants to their new environment and prevent shock.
Following these steps on how to thin out seedlings and transplant them will ensure that your plants have the space they need to thrive. It’s important to give your seedlings enough room to grow, but also not overcrowd them as this can lead to competition for nutrients and hinder their growth.
Tips for Successful Seedling Thinning
Choose the Right Time:
Thin out seedlings when they have developed their first true leaves. This usually indicates that they are strong enough for the process.
Use the Right Tools:
Employ small, sharp scissors to snip excess seedlings at the soil line. This reduces the risk of disturbing the roots of the remaining plants.
Leave the Strongest Seedlings:
Select the healthiest and most robust seedlings to remain in place, as they have the best chance to grow into strong, mature plants.
Maintain Proper Spacing:
Refer to the seed packet instructions for the recommended spacing between plants, and adjust accordingly to ensure healthy growth.
Keep Soil Moist:
Water the soil after thinning to help the remaining seedlings recover and establish their roots in the adjusted space.
Thin Gradually if Needed:
For densely planted seedlings, you can thin them in multiple stages to avoid stress and give yourself time to decide on the best plants to keep.
Replant with Care:
If you choose to transplant thinned seedlings, handle them gently by the leaves to avoid damaging their delicate stems and roots.
Remember, thinning is an essential step in gardening that ensures your plants have the best chance to thrive without unnecessary competition.
Frequently Asked Questions
Q: Why is Thinning Important in Gardening?
A: Thinning is crucial in gardening because it allows plants to have enough space, nutrients, and sunlight to grow properly. If too many seeds are planted closely together, they will compete for resources, resulting in weaker and stunted growth.
Q: When Should I Start Thinning My Seedlings?
A: The best time to start thinning your seedlings is when they have developed their first set of true leaves. This usually occurs a few weeks after germination. It is important to think as early as possible to avoid overcrowding and competition among plants.
Q: How Do I Thin My Seedlings?
A: To thin your seedlings, gently pull out the unwanted seedlings from the soil, leaving only one plant per spacing recommendation on the seed packet. You can also use scissors or gardening shears to carefully cut off the unwanted seedlings at soil level.
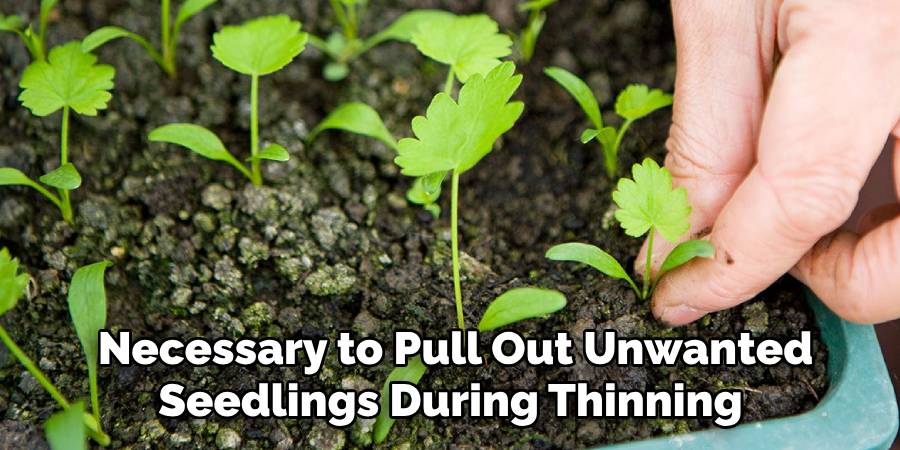
Q: Is it Okay to Pull Out Seedlings?
A: Yes, it is completely safe and necessary to pull out unwanted seedlings during thinning. The remaining seedling will have more space and resources to grow into a healthy plant.
Conclusion
Thinning seedlings is a crucial step in ensuring the success of your garden. By providing each plant with adequate space, light, and nutrients, you give them the best chance to thrive and produce a healthy yield. Remember to follow the spacing recommendations on your seed packets and handle your plants delicately during the process.
With proper care and attention, your garden will flourish, rewarding your efforts with robust and bountiful plants. Thanks for reading this article on how to thin out seedlings.
About
Jennifer Branett is a distinguished figure in the world of Garden design, with a decade of expertise creating innovative and sustainable indoor solutions. His professional focus lies in merging traditional craftsmanship with modern manufacturing techniques, fostering designs that are both practical and environmentally conscious. As the author of garden, Jennifer delves into the art and science of garden-fix, inspiring artisans and industry professionals alike.
Education RMIT University
(Melbourne, Australia) Associate Degree in Design (Jennifer Branett) Focus on sustainable design, industry-driven projects, and practical craftsmanship. Gained hands-on experience with traditional and digital manufacturing tools, such as CAD and CNC software.
Nottingham Trent University
(United Kingdom) Bachelor’s in Garden and Product Design (Honors) Specialized in product design with a focus on blending creativity with production techniques. Participated in industry projects, working with companies like John Lewis and Vitsoe to gain real-world insights.Publications and Impact
In indoor, Jennifer Branett his insights on Garden design processes, materials, and strategies for efficient production. His writing bridges the gap between artisan knowledge and modern industry needs, making it a must-read for both budding designers and seasoned professionals.