
Are you a lover of shamrock plants? Have you been wondering how to transplant a shamrock plant? Don’t worry, you’re not alone!
Transplanting a shamrock plant is a straightforward process that allows your plant to thrive in a more suitable environment. Whether your shamrock has outgrown its current pot or the soil needs refreshing, moving it to a new pot is essential for its health and growth. By carefully preparing the plant and its new container, you can ensure a smooth transition and promote vibrant, long-lasting foliage. Additionally, transplanting your shamrock plant allows you to add a personal touch to your home decor by choosing a new pot that complements the plant and your style.
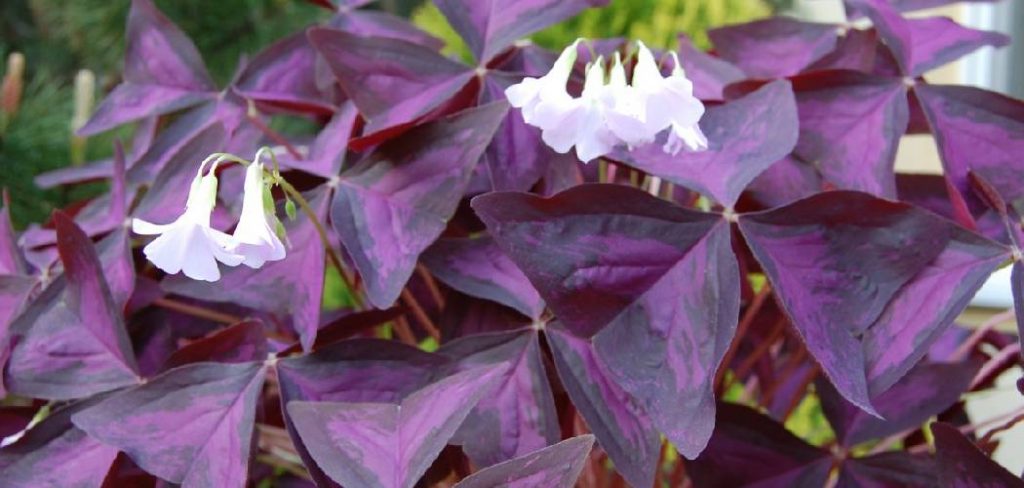
This guide on transplanting a shamrock plant will walk you through the necessary steps to successfully transplant your shamrock plant.
What Are the Benefits of Transplanting a Shamrock Plant?
Transplanting a shamrock plant has several benefits, including:
- Promotes Healthy Growth: As mentioned earlier, transplanting promotes healthy growth by providing fresh soil and nutrients to the roots of the plant.
- Allows for Repotting: Repotting your shamrock plant allows you to choose a new pot that complements your home decor and personal style.
- Prevents Overcrowding: If your shamrock plant has outgrown its current container, transplanting it into a bigger pot will give its roots more space to grow and prevent overcrowding.
- Removes Pests and Diseases: By carefully inspecting the roots of your shamrock plant during repotting, you can remove any pests or diseases that may be present and prevent them from spreading to other plants.
What Will You Need?
Before you begin the repotting process, make sure you have the following items on hand:
- A new pot that is one size bigger than your current pot
- High-quality potting soil
- A trowel or a spoon for scooping soil
- Gardening gloves (optional)
- Pruning shears (optional)
10 Easy Steps on How to Transplant a Shamrock Plant
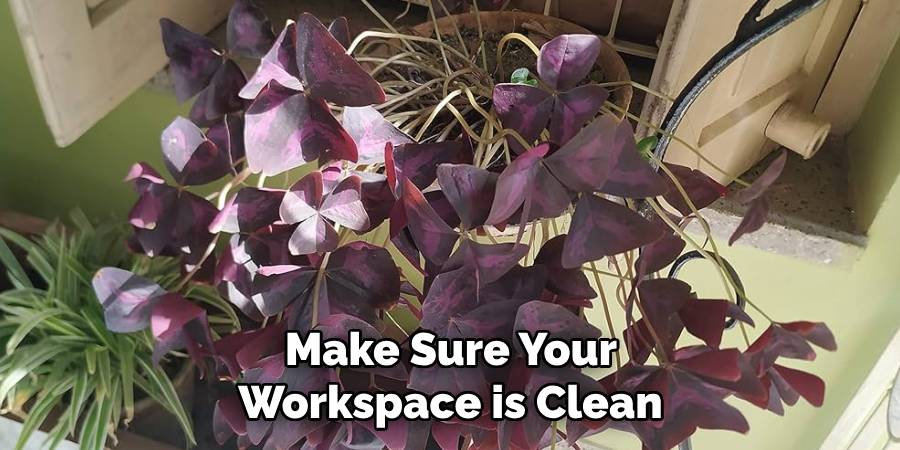
1. Prepare Your Workspace
Make sure your workspace is clean, organized, and well-lit before you start. Choose an area where you don’t mind getting a little messy, such as a countertop, table, or even outside. Lay down a newspaper, a plastic sheet, or an old towel to protect the surface and make cleanup easier. Ensure all your tools and materials, like the new pot, potting soil, trowel, and gloves, are within reach so you won’t have to interrupt the process to find something. A properly prepared workspace sets the stage for a smooth, efficient, and enjoyable repotting experience.
2. Water the Plant
Watering the plant before repotting is an essential step to ensure the roots are hydrated and more pliable during the process. Use enough water to moisten the soil without making it soggy, as overly wet soil can create a mess and make handling the plant difficult. Allow the water to soak in for a few minutes, ensuring the entire root ball is evenly damp. This step helps reduce transplant shock and makes it easier to remove the plant from its current pot without damaging the roots.
3. Remove the Plant from Its Current Pot
Gently tap the sides of the pot to loosen the soil if necessary, and carefully hold the base of the plant near the stem. Tilt the pot slightly and, if needed, use a small tool or your hand to help guide the plant out of its container. Avoid pulling the plant by its stem or leaves, as this can cause damage. If the plant is stuck, check the bottom of the pot to ensure roots aren’t growing through the drainage holes, and trim them if needed. Once the plant is free, examine the roots for any signs of rot or tangling, and prune as necessary before transplanting.
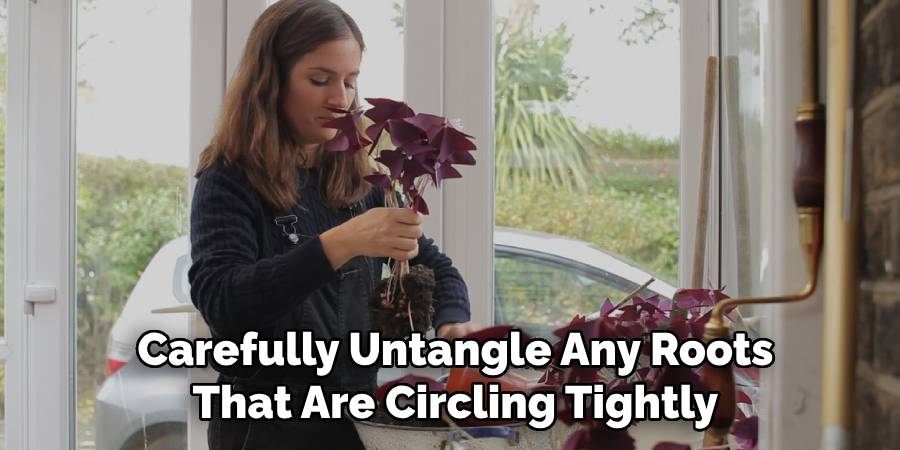
4. Inspect the Roots
Healthy roots are typically white or light tan and feel firm to the touch. Carefully untangle any roots that are circling tightly around the root ball, as they can impede the plant’s growth if left unchecked. If you notice any black, mushy, or foul-smelling roots, these are likely signs of root rot and should be pruned away using sanitized scissors or pruning shears. Take care to remove only the affected areas, leaving as much healthy root system intact as possible. This step ensures the plant can establish strong roots in its new container or location, promoting healthy growth.
5. Add Soil to the New Pot
Begin by adding a layer of fresh potting soil to the bottom of the new pot. Choose a high-quality soil mix that aligns with the specific needs of your plant type, such as well-draining soil for succulents or nutrient-rich soil for flowering plants. Position the plant in the pot, ensuring that the root ball sits at the right depth, slightly below the rim of the pot to allow for proper watering. Carefully fill in the remaining space around the roots with soil, gently pressing it down to eliminate air pockets.
6. Position the Plant
Once the plant is potted, place it in a location that meets its light and environmental needs. For instance, a sun-loving plant should be positioned in a bright, south-facing window, while a shade-tolerant plant might thrive in an east-facing room or a spot with indirect light. Be mindful of factors like drafts, humidity levels, and temperature fluctuations, as these can impact the plant’s growth. Take the time to observe how your plant responds to its new environment and adjust its position if necessary to ensure it thrives.
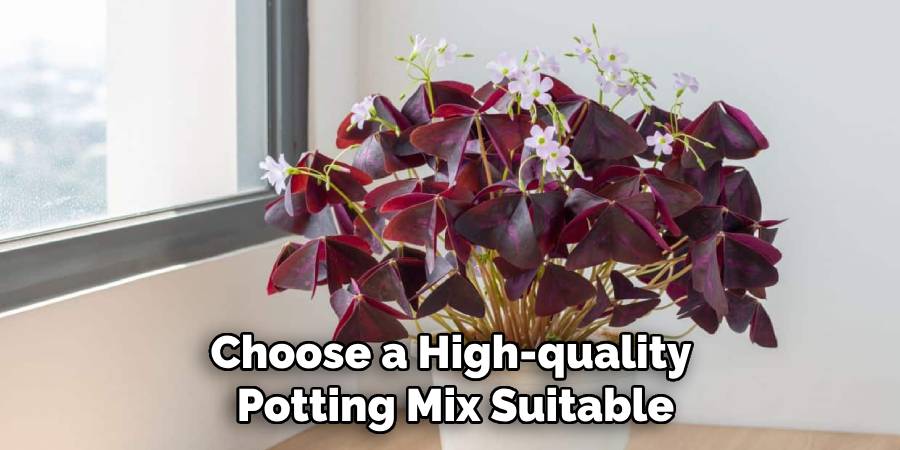
7. Fill the Pot with Soil
Choose a high-quality potting mix suitable for the type of plant you are repotting. Ensure the soil is loose and well-draining to prevent waterlogging, which can lead to root rot. Begin by filling the bottom of the pot with a small layer of soil, creating a stable base for the plant. Center the plant in the pot, making sure its roots have enough space to spread out, and then carefully add more soil around the roots. Gently press the soil down to eliminate air pockets but avoid compacting it too tightly, as this could hinder water flow and root growth. Leave enough room at the top of the pot for watering.
8. Water Thoroughly
Water the plant generously immediately after potting to help the soil settle and ensure the roots make good contact with their new environment. Allow the water to flow through the drainage holes at the bottom of the pot, indicating that the soil is fully saturated. However, avoid overwatering, as this can lead to soggy soil and potentially harm the roots. Always monitor the plant’s specific watering needs, as these can vary based on its type, size, and the environmental conditions.
9. Adjust and Clean
Once your plant is securely potted, take a moment to adjust its position. Ensure that the plant is standing upright and centered in the pot for optimal growth and aesthetic appeal. Gently press the soil around the base if necessary to stabilize it. Afterward, clean the leaves to remove any dust or debris that may have accumulated. For most plants, a damp cloth or a gentle rinse is sufficient to keep the foliage healthy and vibrant. Regular cleaning not only improves the plant’s appearance but also enhances its ability to photosynthesize effectively.
10. Place the Plant in Its New Home
Choose a location that provides the appropriate amount of sunlight, temperature, and humidity based on your plant’s specific needs. Ensure the spot is free from drafts, excessive heat, or cold air that could harm the plant. If the plant requires indirect light, consider placing it near a window with sheer curtains or in a well-lit room without direct sun exposure. After positioning the plant, monitor its condition over the next few days to ensure it adapts well to its new environment, making adjustments as necessary.
By following these steps, you can successfully transplant your shamrock plant and provide it with the ideal conditions for healthy growth.
5 Things You Should Avoid
- Transplanting During Dormancy
Avoid transplanting your shamrock plant while it is in its dormant phase. Shamrock plants typically go dormant after their blooming period, and disturbing them during this time can hinder their recovery and future growth.
- Overwatering Before Transplanting
Do not water the plant excessively before transplanting. Overwatering can lead to soggy soil, making it harder to handle the plant and potentially causing root rot during the transplant process.
- Using Poor-Quality Soil
Avoid using garden soil or low-quality potting mixes, as they may lack the proper drainage and nutrients the plant needs. Opt for well-draining potting soil designed for houseplants to provide the best growing conditions.
- Damaging the Roots
Be gentle when handling the roots during the transplant process. Breaking or tearing the delicate roots can shock the plant or lead to infection, ultimately jeopardizing its health.
- Placing the Plant in the Wrong Spot
Do not place the transplanted shamrock plant in an area with inadequate lighting or temperature extremes. Ensure it is positioned in a location with indirect light and a stable, comfortable temperature to promote healthy growth.

Conclusion
How to transplant a shamrock plant can be a simple and rewarding process when done with patience and care.
By ensuring the roots are handled gently, selecting an appropriate spot with optimal lighting and temperature, and providing the plant with proper aftercare, you can help it thrive in its new environment.
Following these steps will not only promote the health of your shamrock plant but also ensure its long-term beauty and vitality.
About
Jennifer Branett is a distinguished figure in the world of Garden design, with a decade of expertise creating innovative and sustainable indoor solutions. His professional focus lies in merging traditional craftsmanship with modern manufacturing techniques, fostering designs that are both practical and environmentally conscious. As the author of garden, Jennifer delves into the art and science of garden-fix, inspiring artisans and industry professionals alike.
Education RMIT University
(Melbourne, Australia) Associate Degree in Design (Jennifer Branett) Focus on sustainable design, industry-driven projects, and practical craftsmanship. Gained hands-on experience with traditional and digital manufacturing tools, such as CAD and CNC software.
Nottingham Trent University
(United Kingdom) Bachelor’s in Garden and Product Design (Honors) Specialized in product design with a focus on blending creativity with production techniques. Participated in industry projects, working with companies like John Lewis and Vitsoe to gain real-world insights.Publications and Impact
In indoor, Jennifer Branett his insights on Garden design processes, materials, and strategies for efficient production. His writing bridges the gap between artisan knowledge and modern industry needs, making it a must-read for both budding designers and seasoned professionals.